Assignment: Bootloaders and Operating Systems
For this assignment, you will install Alpine Linux operating systems in both x86_64 and AArch64 virtual machines. You will then customize the bootloaders (Syslinux and GRUB, respectively) on each machine.
Background Material
We will be using Alpine Linux for this assignment. You will need to install Alpine Linux twice in two separate QEMU virtual machines. The first virtual machine will use the x86_64 architecture and will boot using legacy BIOS, while the second virtual machine will use the AArch64 architecture and will boot using UEFI. On the x86_64 virtual machine, you will use the Syslinux (more precisely, EXTLINUX) bootloader; the AArch64 virtual machine will use the GRUB bootloader. The primary objectives of this assignment are to get Alpine Linux installed on both virtual machines and to customize the bootloader menus for both Syslinux (EXTLINUX) and GRUB.
To begin, you might want to review Using QEMU to see how the virtual machines are created.
Obtaining Alpine Linux
For this assignment, you can download the “Virtual” ISO files for x86_64 and aarch64.
Reference Material
Alpine Basics
When you boot into the Alpine Linux installation environment, you are in a basic Alpine system that runs from RAM. This system uses BusyBox with the Almquist shell (ash), which doesn’t have as many features as the default shell in many other distributions (typically the Bourne-again Shell, or bash). For the purposes of performing the installation, this difference shouldn’t matter too much. However, you will want to install bash or zsh to use as your day-to-day shell after performing the initial installation.
By default, the editor that you will need to use for adjusting configuration files is vi, which is a fairly limited version that comes with BusyBox. You might want to watch my demonstration video, A Minimal Introduction to Vi, if you aren’t already familiar with this editor.
There are several possible installation modes for Alpine Linux, including diskless, data disk, and system (sys) modes. We will use sys mode for this assignment.
APK Repository Notes
The setup-apkrepos command doesn’t do a great job of configuring the Alpine Linux repositories. It’s better to edit /etc/apk/repositories by hand. Set the content to:
https://dl-cdn.alpinelinux.org/alpine/v3.16/main
https://dl-cdn.alpinelinux.org/alpine/v3.16/community
@testing https://dl-cdn.alpinelinux.org/alpine/edge/testing
The final line of that configuration permits installation of bleeding-edge testing packages by specifying the target as pkgname@testing when doing an installation. You may need some packages from testing for certain purposes (e.g. printer drivers, Tomcat server, etc.).
Syslinux on x86_64
To use the Syslinux (more precisely, EXTLINUX) bootloader, you need to partition the disk with a separate /boot partition. This can be done using the fdisk command to create two partitions, both of type “Linux”: a 500 MiB boot partition, and the rest of the disk used for the root partition. Be sure to set the boot flag on the boot partition using the a command in fdisk.
Before running the setup-disk command, be sure your /etc/apk/repositories file is updated as shown above. Run the following commands:
apk update
apk add syslinux
After running setup-disk, run the following command to install the required boot code to the Master Boot Record (MBR) of the disk:
dd bs=440 count=1 conv=notrunc if=/mnt/usr/share/syslinux/mbr.bin of=/dev/vda
Reboot into the new system, which will use a hidden boot menu by default. You can then update the /boot/extlinux.conf file to implement your custom menu. The following documents may be helpful:
- Syslinux Examples - ArchWiki
- Menu - Syslinux Wiki
GRUB EFI on AArch64
Installing GRUB in UEFI mode on AArch64 is a bit challenging. First, the Alpine Linux installer doesn’t properly install GRUB automatically. Second, there is an issue accessing the EFI variables from Linux within the AArch64 environment, so it is necessary to add a boot entry for grub using the EFI Shell.
Once the setup-disk step finishes, run the following commands:
mount -o bind /dev /mnt/dev
mount -o bind /proc /mnt/proc
mount -o bind /sys /mnt/sys
chroot /mnt
grub-install --target=arm64-efi --bootloader-id=grub --efi-directory=/boot/efi --removable --no-nvram
grub-mkconfig -o /boot/grub/grub.cfg
exit
umount -l /mnt/dev
umount -l /mnt/proc
umount -l /mnt/sys
poweroff
The –removable flag puts the bootloader in a default location, while the –no-nvram flag skips any attempts to set the boot order. We have to configure the boot order manually using the UEFI shell. To perform this step, first edit your shell script, batch file, or PowerShell script as follows:
- Remove the -drive argument that specifies the Alpine Linux ISO file, as we no longer need it.
- Change the -device virtio-vga argument to -device ramfb instead. This adjustment will enable us to access the TianoCore boot menu when the virtual machine is first started.
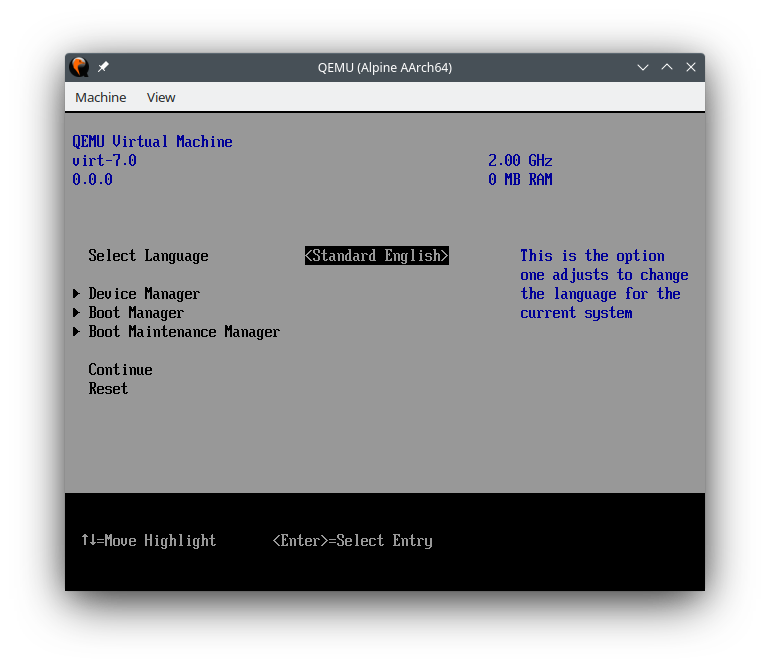
Boot the virtual machine with the modified configuration. Immediately press the Esc key at the TianoCore splash screen to enter the UEFI setup application. If you miss this keypress, use the Machine…Reset option in the QEMU window to reboot and try again.
At the TianoCore main menu (Figure 1), use the down arrow to navigate to the Boot Manager. Press the Enter key.
In the Boot Manager menu (Figure 2), navigate to the EFI Internal Shell by using the down arrow. Press Enter to start the EFI shell application.

Let the EFI shell run the startup.nsh script, as shown in Figure 3.
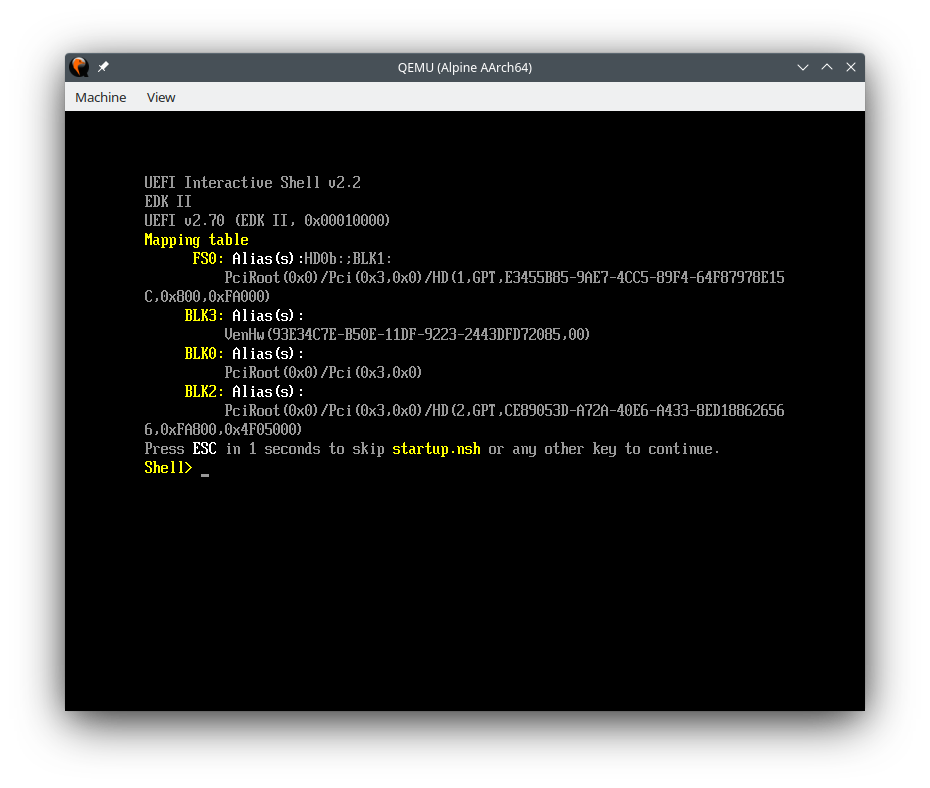
Run the following commands in the EFI shell:
fs0:
bcfg boot add 0 EFI\BOOT\BOOTAA64.EFI "GRUB"
reset
When the virtual machine reboots, you should briefly see the GRUB menu in the ramfb display device. The screen will then switch to a blinking cursor for a bit (boot messages will be in the serial console device). Once the boot process finishes, a login screen will appear in the rambfb and serial devices. You can now begin the process of configuring the GRUB menu according to the assignment requirements. The following documents might be helpful:
- GRUB - Custom grub.cfg - ArchWiki
- Writing your own configuration file - GRUB Documentation
- Theme file format - GRUB Documentation
Requirements
Prepare a video presentation with the following information:
- Record the startup process for your x86_64 virtual machine. Show that you have customized the Syslinux (EXTLINUX) boot menu with different colors and your name(s) somewhere on the menu screen (in the title or as dummy entries). You may make this menu as fancy as you’d like.
- Demonstrate that you can boot the x86_64 virtual machine into a working installation of Alpine Linux.
- Record the startup process for your AArch64 virtual machine. Show that you have customized the GRUB boot menu with different colors and your name(s) somewhere on the menu screen (in the title or as dummy entries). You may make this menu as fancy as you’d like.
- Demonstrate that you can boot the AArch64 virtual machine into a working installation of Alpine Linux.
If you elect to work with a partner, you should each present for approximately equal time.
Be sure to include the URLs to your portfolio (or both portfolios, if working with a partner) in the presentation.
Portfolio Items
Include the following items in your portfolio:
- Screenshot of your x86_64 Syslinux (EXTLINUX) boot menu. Include a caption or an annotation explaining that the picture is of a customized Syslinux boot menu running in an x86_64 QEMU virtual machine.
- Screenshot of your AArch64 GRUB boot menu. Include a caption or an annotation explaining that the picture is of a customized GRUB boot menu running in an AArch64 QEMU virtual machine.
Submission Requirements
Submit your presentation video to one of the weekly submission boxes for the course. If you’re working with a partner, only one person needs to submit the video.
