Configuring LibreWolf
In this hands-on activity, you will install and configure the LibreWolf browser. Note that you need access to a Linux, macOS, or Windows computer for this activity. You cannot use a Chromebook for this exercise (nor should you be using one anyway from a privacy perspective).
Step 1: Download and Install Librewolf
Follow the instructions for your platform:
- Linux users can likely install LibreWolf through the system package manager or via Flatpak (LibreWolf on Flathub). There is also an AppImage available from the developers if all else fails.
- LibreWolf Installation instructions for macOS
- LibreWolf Installation instructions for Windows
Step 2: Open and Configure LibreWolf
Start LibreWolf and find the Settings menu. The location of this menu will differ based on your operating system. In Linux, for example, this menu can be found by clicking the hamburger icon in the upper right corner of the browser window and selecting Settings.
Adjust the following settings. The remainder of the settings that are not listed here aren’t important for our purposes.
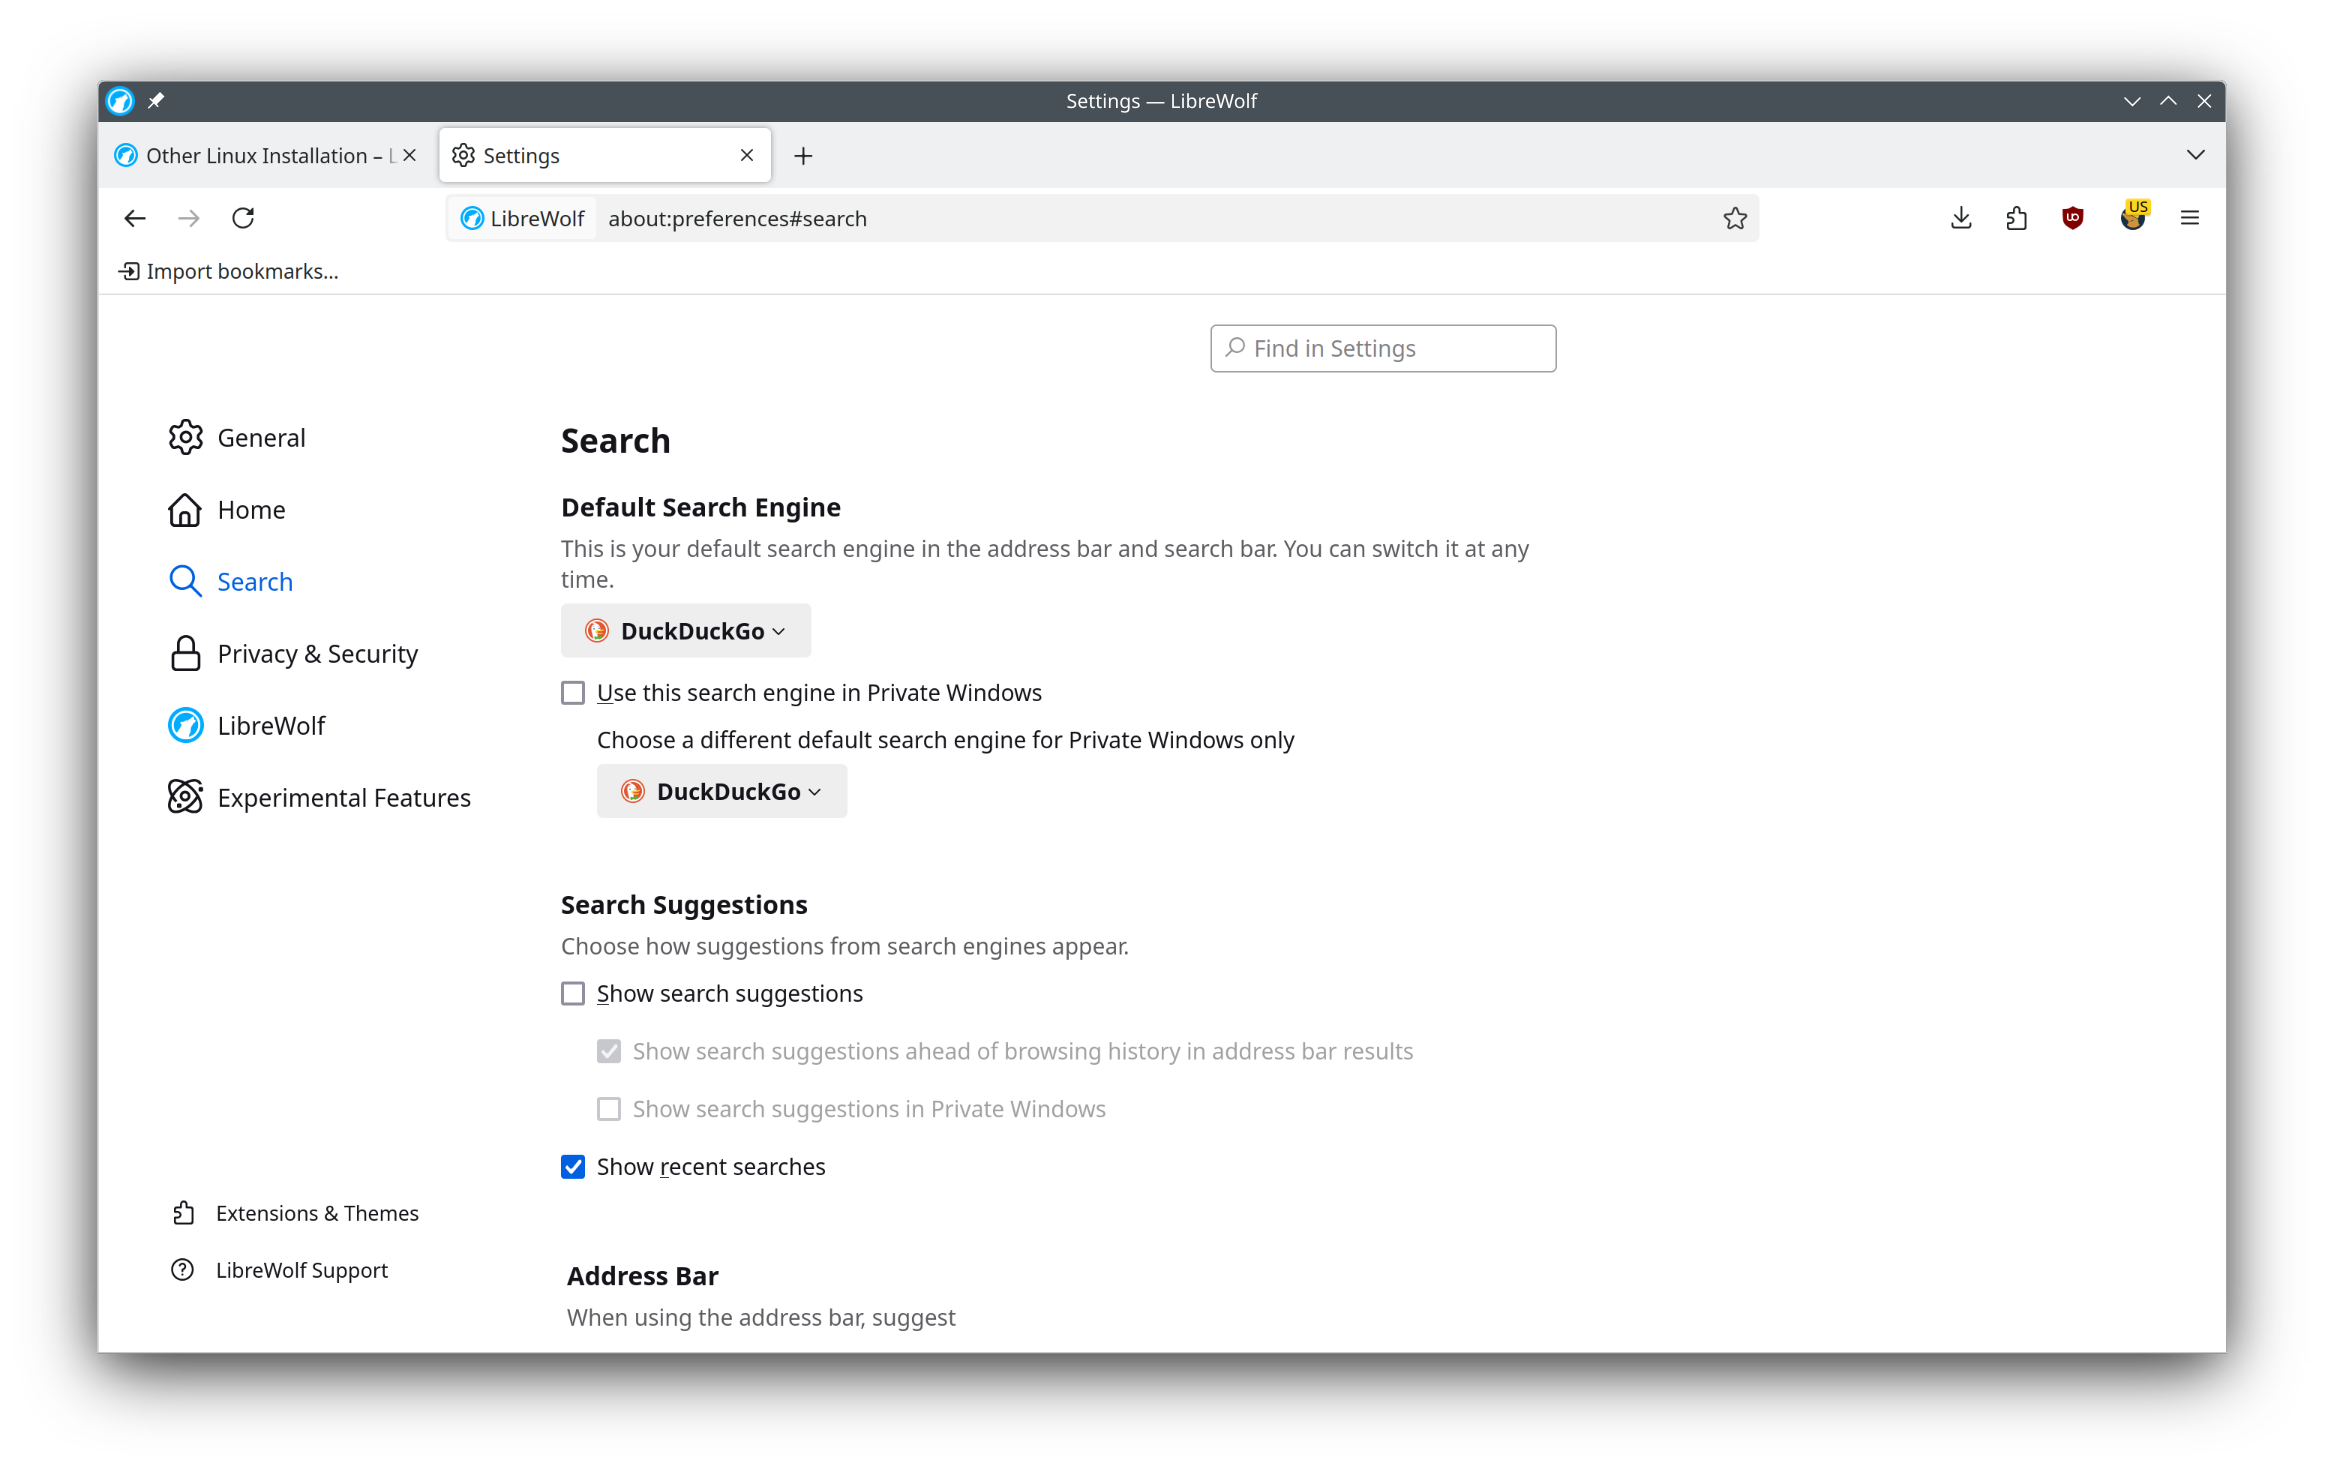
- Under the Search category (Figure 1):
- Ensure that the Default Search Engine to DuckDuckGo.
- Turn OFF Search Suggestions if they are enabled. Using Search Suggestions causes everything you type into the address bar to be sent to your search engine.

-
Under the Privacy & Security category (Figure 2):
- Click the “Settings…” button next to the “Clear history when LibreWolf closes” option.
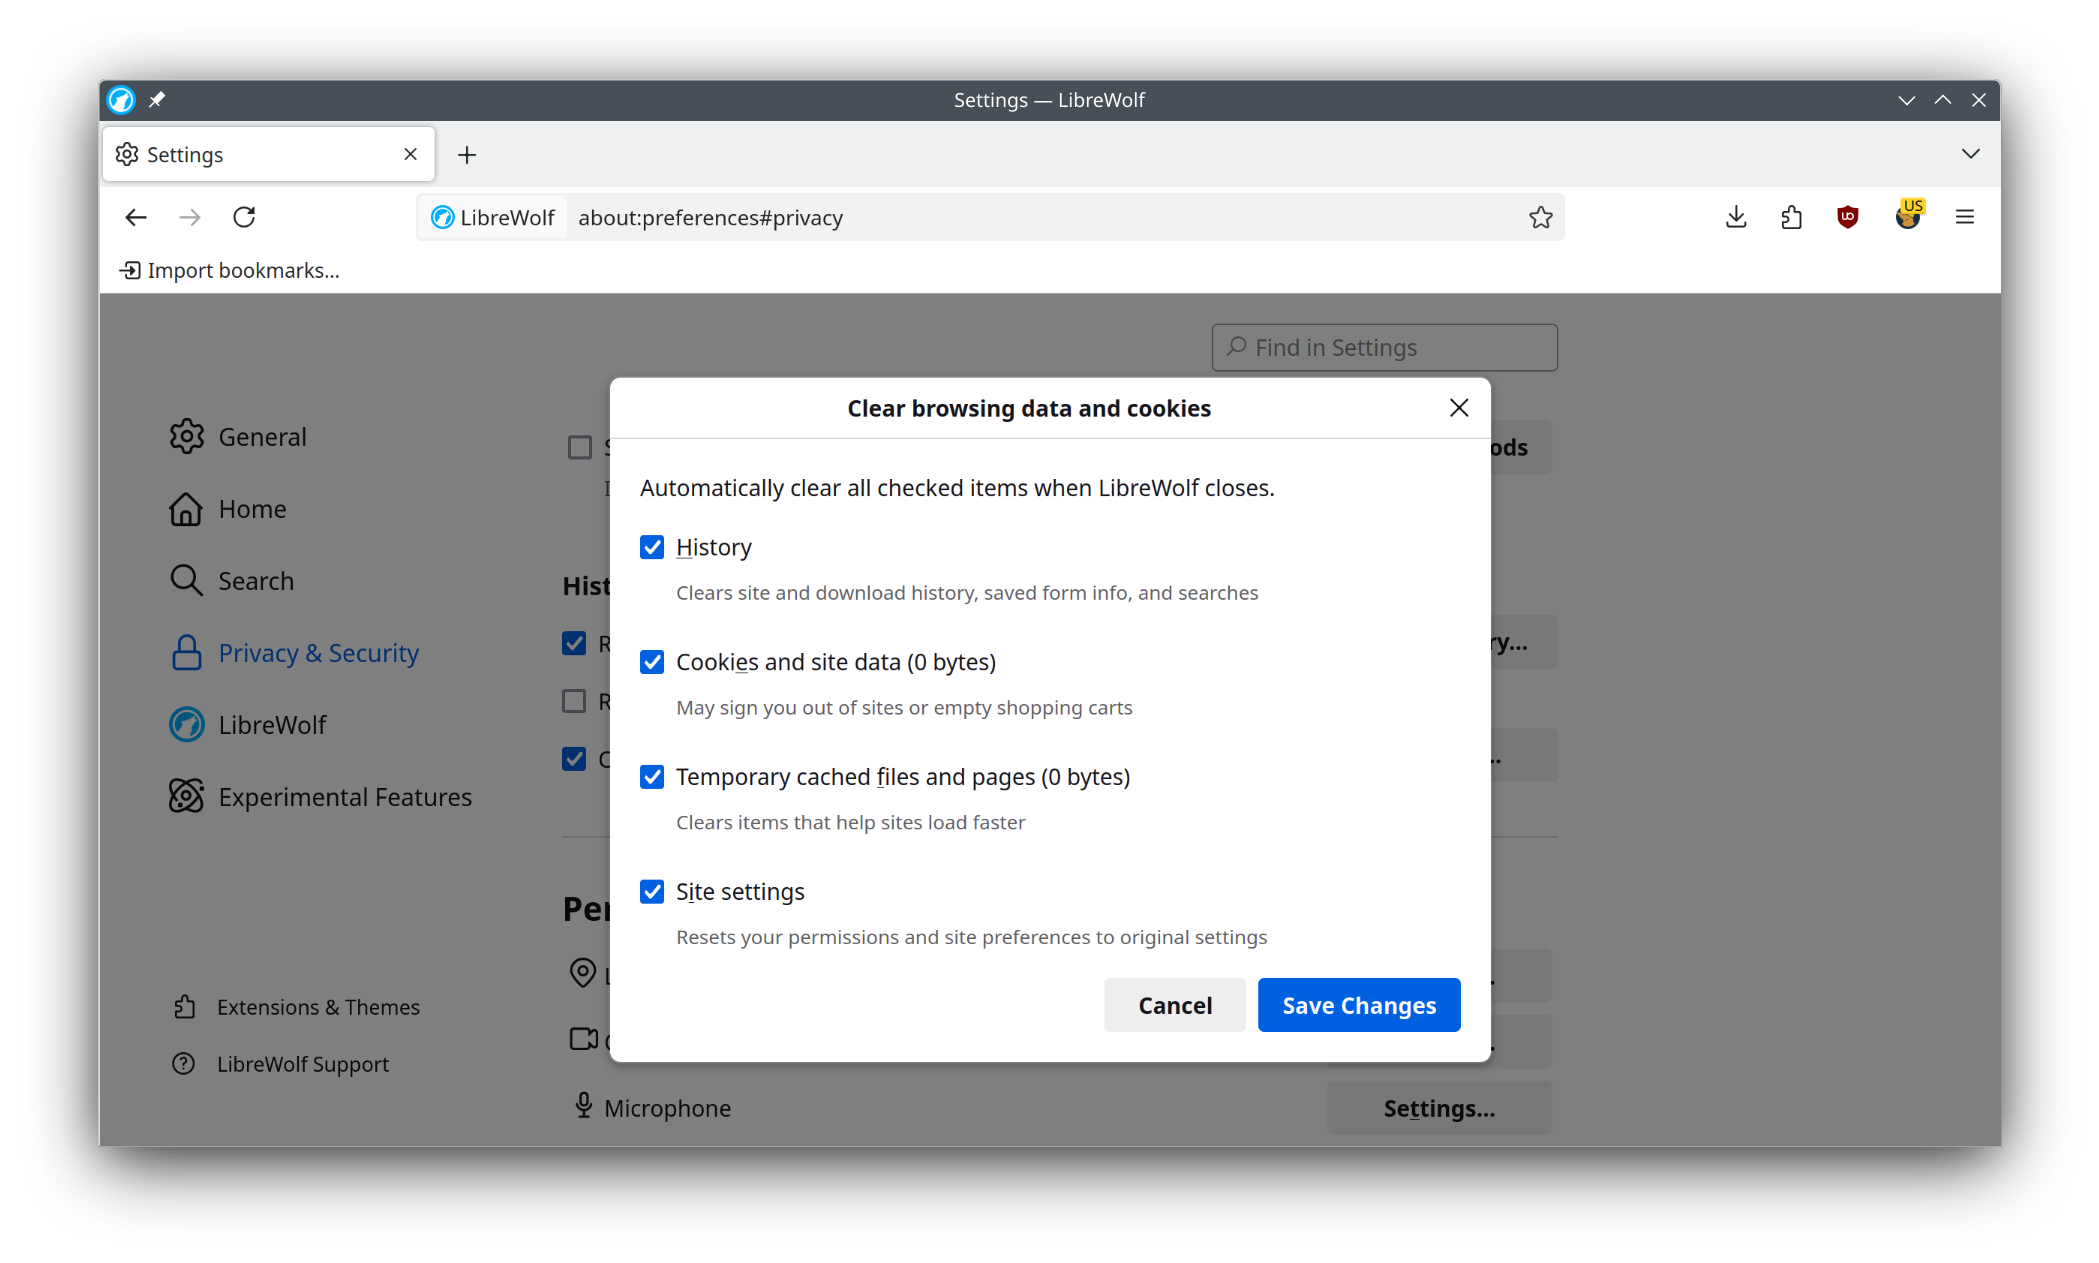
Figure 3: LibreWolf history clearing. - Check all boxes, as shown in Figure 3. These settings will prevent your browsing history from being recovered using digital forensics tools.
- Under each category in Permissions, I recommend blocking new requests for access to each type of data. However, if you will be using online services that require access to your camera, microphone, etc., you can leave them in “ask” mode. I strongly suggest disabling notifications in any case, since websites may use notifications to send ads directly to your desktop.
- You can optionally enable DNS over HTTPS, especially if you only use your computer off campus. I recommend the Mullvad (No Filtering) provider if you decide to enable this option. Note that some University systems may not work correctly if you have DNS over HTTPS enabled while on campus, so you might want to leave this setting turned off if you use your computer on eduroam or in the dorms.
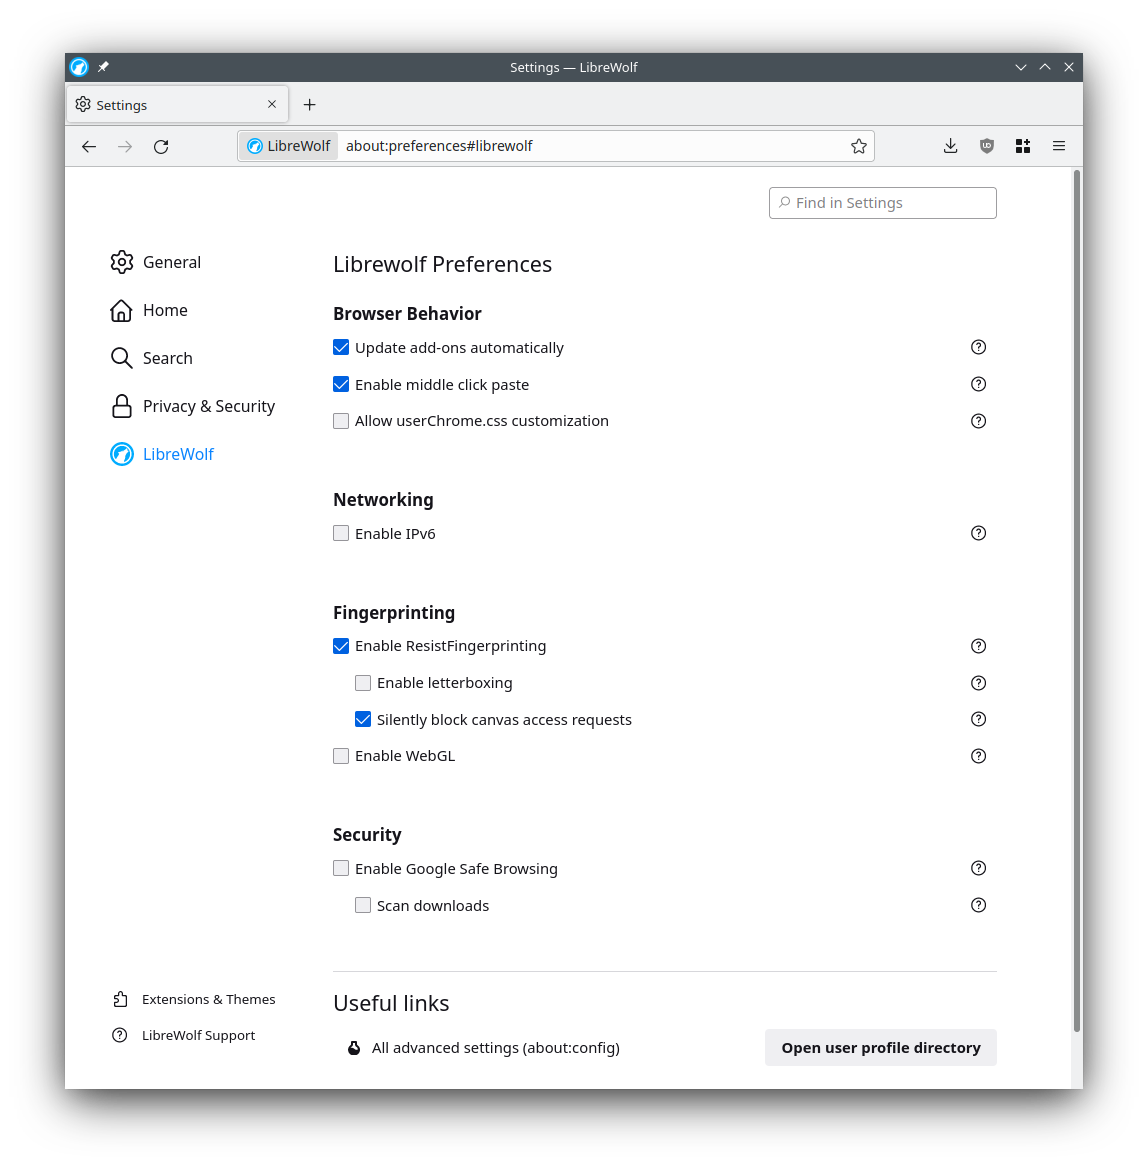
Figure 4: LibreWolf-specific settings. - Under the LibreWolf category (Figure 4), enable letterboxing support under Fingerprinting. This setting will resize the active browser window area to a common resolution that fits within the window size, improving resistance to browser fingerprinting.
Step 3: Configure uBlock Origin
- Go to the Extensions & Themes category, which will open the Add-ons Manager tab.
- On the Extensions page, click the button with 3 dots next to uBlock Origin, then pick Preferences from the dropdown menu.
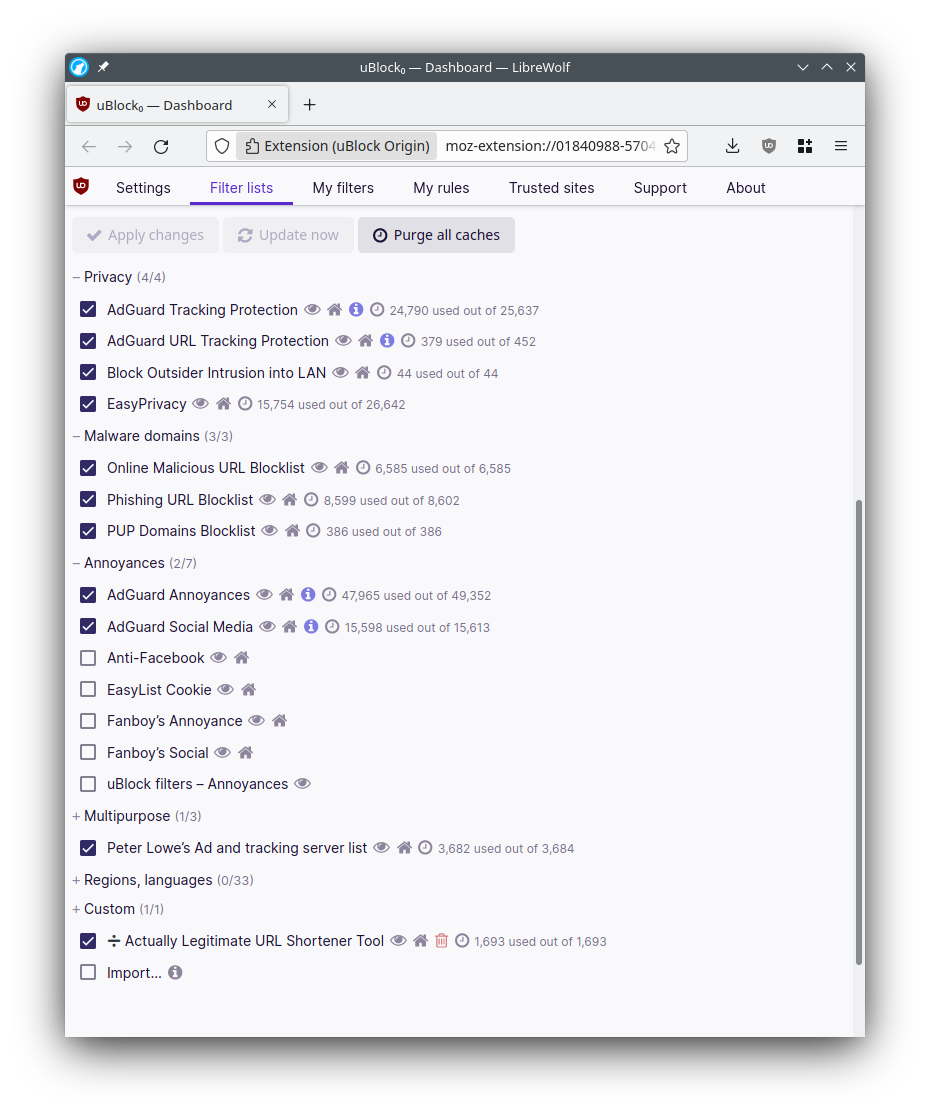
- Leave the Settings page alone, and switch to the Filter lists page. (Figure 5)
- Click the arrows next to Ads, Privacy, and Malware protection. Turn on all subscriptions in those categories.
- You can also turn on filters for blocking cookie notices, social networking widgets, and other annoyances.
- Click the “Apply changes” button at the top. The filter lists should start updating automatically (if not, click the “Update now” button). Wait for the updates to finish before closing the tabs.
Step 4: Restart LibreWolf
Close the LibreWolf browser and then restart it. It should now be ready for use.
